
Diagnosing Soil Compaction on Grazing Lands
 Print This Post
By Justin Morris
In an earlier blog, we discussed the causes of soil compaction, largely driven by overgrazing, which reduces rooting depth, root exudation, and soil aggregation. Now that we know the cause of soil compaction, how can we determine if soil compaction is present and the severity of it? Read on to find out.
Diagnosing Compaction
The best way to diagnose compaction is by looking at the structure of the soil as well as root growth patterns. All you need is a shovel, knife, and something to measure with. Here is a link to a video that talks about assessing pasture soil health using these tools. First, locate an area of the pasture that seems representative of the whole pasture. Dig a hole 18 inches deep and at least 12 inches wide. If the hole cannot be dug to an 18-inch depth, dig it as deep as possible. Once the hole is dug, use a knife to pick a side of the face of the hole so any smeared soil created from the shovel while digging is removed. This will greatly help to determine what the roots are doing as well as to examine soil structure. If looking into the hole is a bit difficult, carefully cut out a 2-inch-thick by 6-inch-wide slice the full depth of the hole and place the slice horizontally on the pasture surface (see photo below). Shovels with long, narrow spades are much better suited for this task as it can be difficult to remove the slice fully intact without it falling apart. Once the slice is laid down, it becomes much easier to look at soil structure.
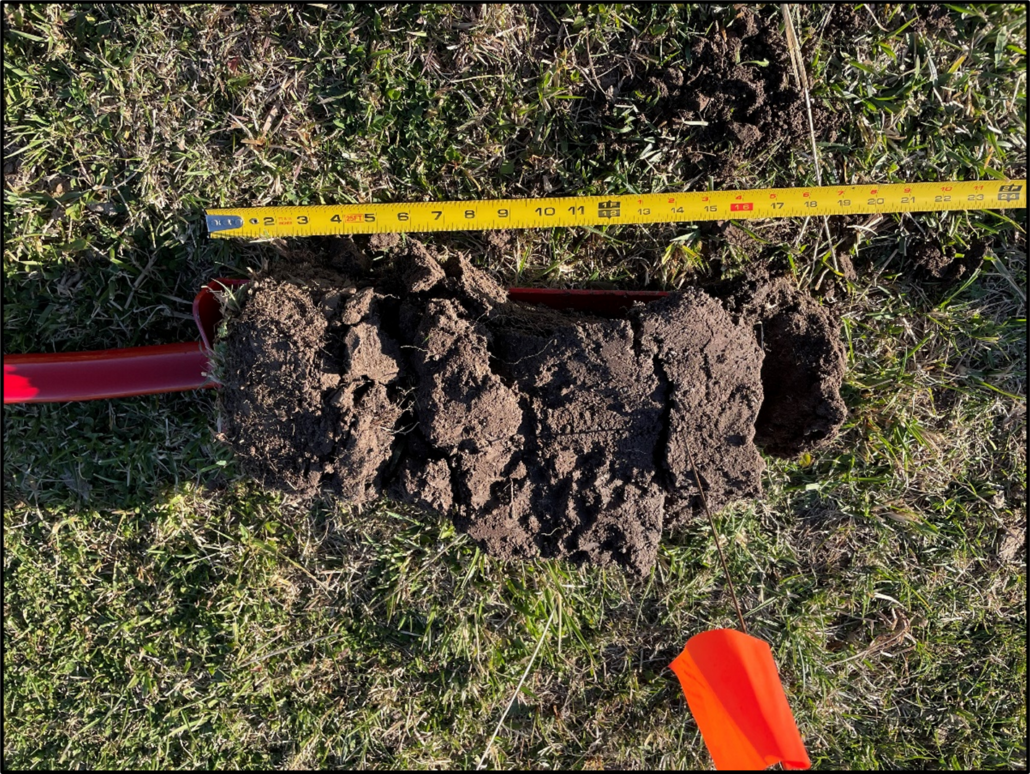
An 18-inch-long slice of soil positioned horizontally on a pasture to make it easier to look at soil structure and rooting depth. Photo: Justin Morris
Whether or not you are looking at the soil in the hole or horizontally placed on the pasture surface, begin at the soil surface and look at rooting depth. Are most of the roots just in the top few inches of the soil or are they plentiful all the way down to the bottom? Pastures with high amounts of compaction generally have most of their roots in the top three inches or so. In fact, the top three inches may be nothing but roots with hardly any soil. This condition is what is called sodbound where the roots are growing horizontally, but not going down vertically to any great extent. While this is great for a sod farm, this is terrible for pasture! The photo below is a good example of such a situation where I used a tape measure and wire pin flag to determine the depths of roots and compaction. Another obvious sign of compaction is by the shape of the primary roots where the root forms into the shape of the letter J otherwise known as J-rooting. In this situation, the primary root grows downward until it encounters a compaction layer, in which case the primary root begins growing sideways in hopes of finding a path to grow downward again.
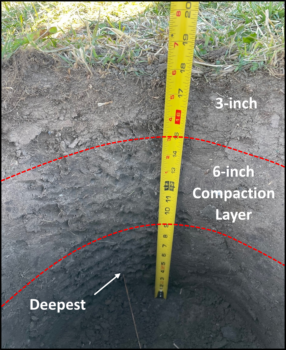
An 18-inch-deep hole in an overgrazed pasture. 90 percent or more of the roots are concentrated in the top 3-inches with a 6-inch-thick compaction zone directly underneath. Very few roots are found in the compaction zone or at deeper depths. Photo: Justin Morris
After looking at roots, look at the soil structure, which comprises the shape and arrangement of soil particles. If soil appears dense with no visible space for air or water, then the soil is usually compacted. If soil has a porous appearance like chocolate cake or baked bread, then the soil is not compacted. Additionally, poking a wire flag into the side of the hole or vertically on a slice laid out horizontally every single inch from the top of the hole to the bottom to feel the relative resistance is a handy way to figure out exactly where compaction begins and ends. For slices of soil laid out horizontally, it is easier to observe where soil density changes (see photo below).
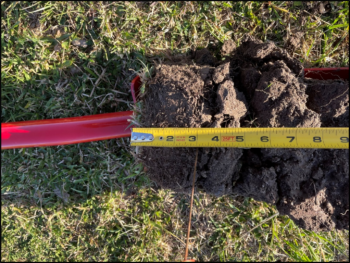
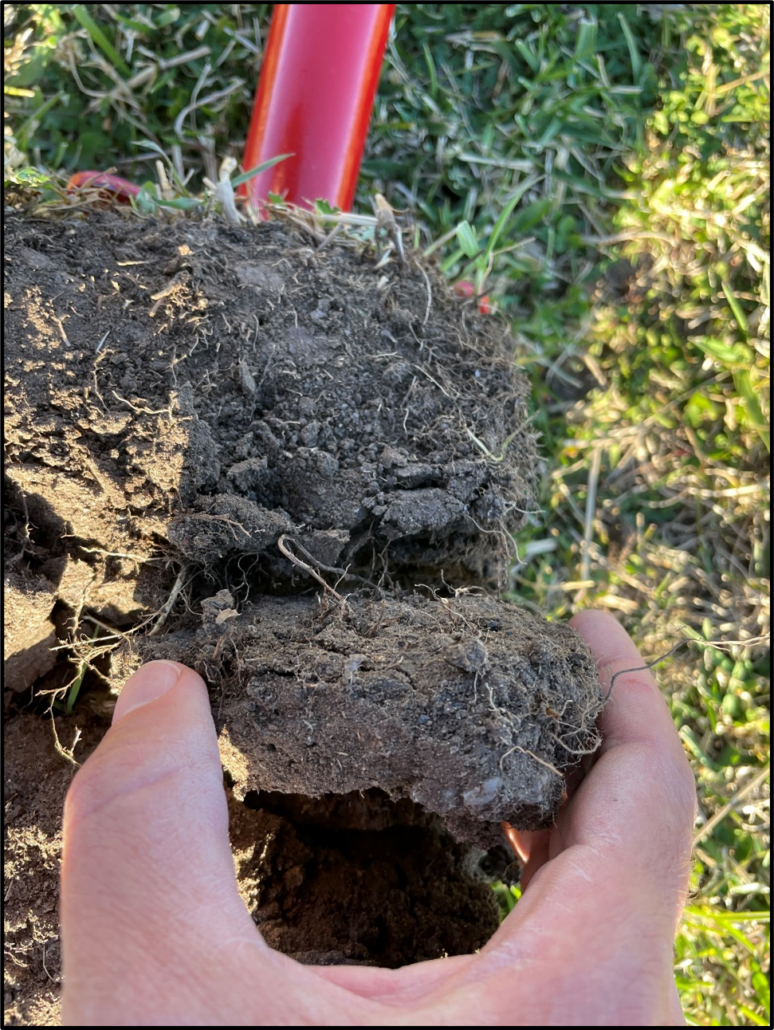
Soil placed horizontally on the pasture surface showing a sodbound condition to a 3-inch depth. The soil below the 3-inch depth is severely compacted as the soil naturally breaks apart horizontally in large clods with very few roots growing through them. Photo: Justin Morris
While it takes a little bit of time and effort to dig a hole to examine rooting depth and soil structure, this is time well spent! The information gathered from this effort is invaluable to determine the extent of the compaction and the best way to eliminate it.
Related ATTRA Resources:
This blog is produced by the National Center for Appropriate Technology through the ATTRA Sustainable Agriculture program, under a cooperative agreement with USDA Rural Development. ATTRA.NCAT.ORG.


